Open Bot Brain
The WARDuino VM has support for specialised hardware that can be used to control Lego Mindstorms components.
Prerequisites
To use WARDuino on this hardware, the Zephyr platform should be used. To get started you will first need to install Zephyr by following the official installation guide.
By default Zephyr will use the STM32CubeProgrammer to flash the board, which you will also need to install.
Cloning WARDuino
To get started with WARDuino for Open Bot Brain you will first need to clone it using the following command:
git clone --recursive git@github.com:TOPLLab/WARDuino.gitAdding your program
Before building WARDuino you will need to specify the program which the VM will execute when starting. To achieve this, you will need to compile your WebAssembly program and place the resulting executable in the platforms/Zephyr directory with the name upload.wasm.
Example
The following program written in AssemblyScript will make one of the built-in LEDs on the board blink.
@external("env", "chip_delay")
declare function delay(value: i32): void;
@external("env", "chip_pin_mode")
declare function pinMode(pin: i32, mode: i32): void;
@external("env", "chip_digital_write")
declare function digitalWrite(pin: i32, value: i32): void;

enum PinVoltage {
    LOW  = 0,
    HIGH = 1,
}

enum PinMode {
  INPUT = 0,
  OUTPUT = 2
}

enum Pin {
  powerSupply = 60,
  led1 = 45,
}

function setup(): void {
    // Configure and enable power supply pin (active low).
    pinMode(Pin.powerSupply, PinMode.OUTPUT);
    delay(500); // Wait for 500ms to avoid current spike.
    digitalWrite(Pin.powerSupply, PinVoltage.LOW);

    // Configure LED.
    pinMode(Pin.led1, PinMode.OUTPUT);
}

export function main(): void {
    setup();

    while (true) {
        digitalWrite(Pin.led1, PinVoltage.HIGH);
        delay(500);
        digitalWrite(Pin.led1, PinVoltage.LOW);
        delay(500);
    }
}This program can be compiled using the following command if you have the AssemblyScript compiler globally installed on your system:
asc blink.ts -o upload.wasmWith the program compiled and placed in the platforms/Zephyr directory you should now have the following directory structure:
.
├── app.overlay
├── boards
│   ├── ...
├── CMakeLists.txt
├── Kconfig
├── main.cpp
├── prj.conf
└── upload.wasm
Building
To build WARDuino for Open Bot Brain, run the following commands starting from the root directory of the repository:
cd platforms/Zephyr
source ~/zephyrproject/zephyr/zephyr-env.sh
source ~/zephyrproject/.venv/bin/activate
west build -b stm32l496g_disco
Flashing
To flash WARDuino to the board, the following command can be used. By default this will use the STM32CubeProgrammer. You can also use a different runner by using the --runner flag, more info can be found in the Zephyr documentation.
west flashOnce flashed, you should start seeing one of the LEDs blink.
Board information
The Open Bot Brain has various built-in LEDs and buttons, in the following table we list some of the pin numbers for use in your programs.
| Description | Pin number |
|---|---|
| Power supply | 60 |
| Motor AB Driver sleep | 46 |
| Motor CD Driver sleep | 78 |
| Led 1 | 45 |
| Led 2 | 56 |
| Led 3 | 39 |
| Button SW1 | 21 |
| Button SW5 | 20 |
| Button SW2 | 10 |
Lego Mindstorms Primitives
Aside from the built-in LEDs and buttons, Open Bot Brain also has 4 input and 4 output ports that can be used to control Lego Mindstorms components.
Outputs
In terms of outputs we support both the NXT and EV3 (medium and large) motors. These can be controlled using the following primitives:
| Primitive | Description |
|---|---|
drive_motor(port, speed) | Makes the motor spin at a constant speed. |
drive_motor_ms(port, speed, time) | Makes the motor spin for x ms. |
drive_motor_degrees(port, speed, angle) | Makes the motor rotate x degrees. |
stop_motor(port) | Actively slows down the motor. |
Inputs
In terms of inputs we supports UART based sensors such as the EV3 Color and Gyro sensors. These can be controlled using the following primitives:
| Primitive | Description |
|---|---|
setup_uart_sensor(port, mode) | Configure the UART sensor and set its mode. |
read_uart_sensor(port) | Read the latest value from the UART sensor. |
Example usage
To illustrate how some of these primitives could be used we show a simple line follower example program. This robot has two wheels and drives left or right depending on if it sees a dark or a light color with its color sensor. By doing so the robot will follow the edge of a dark line on the floor.
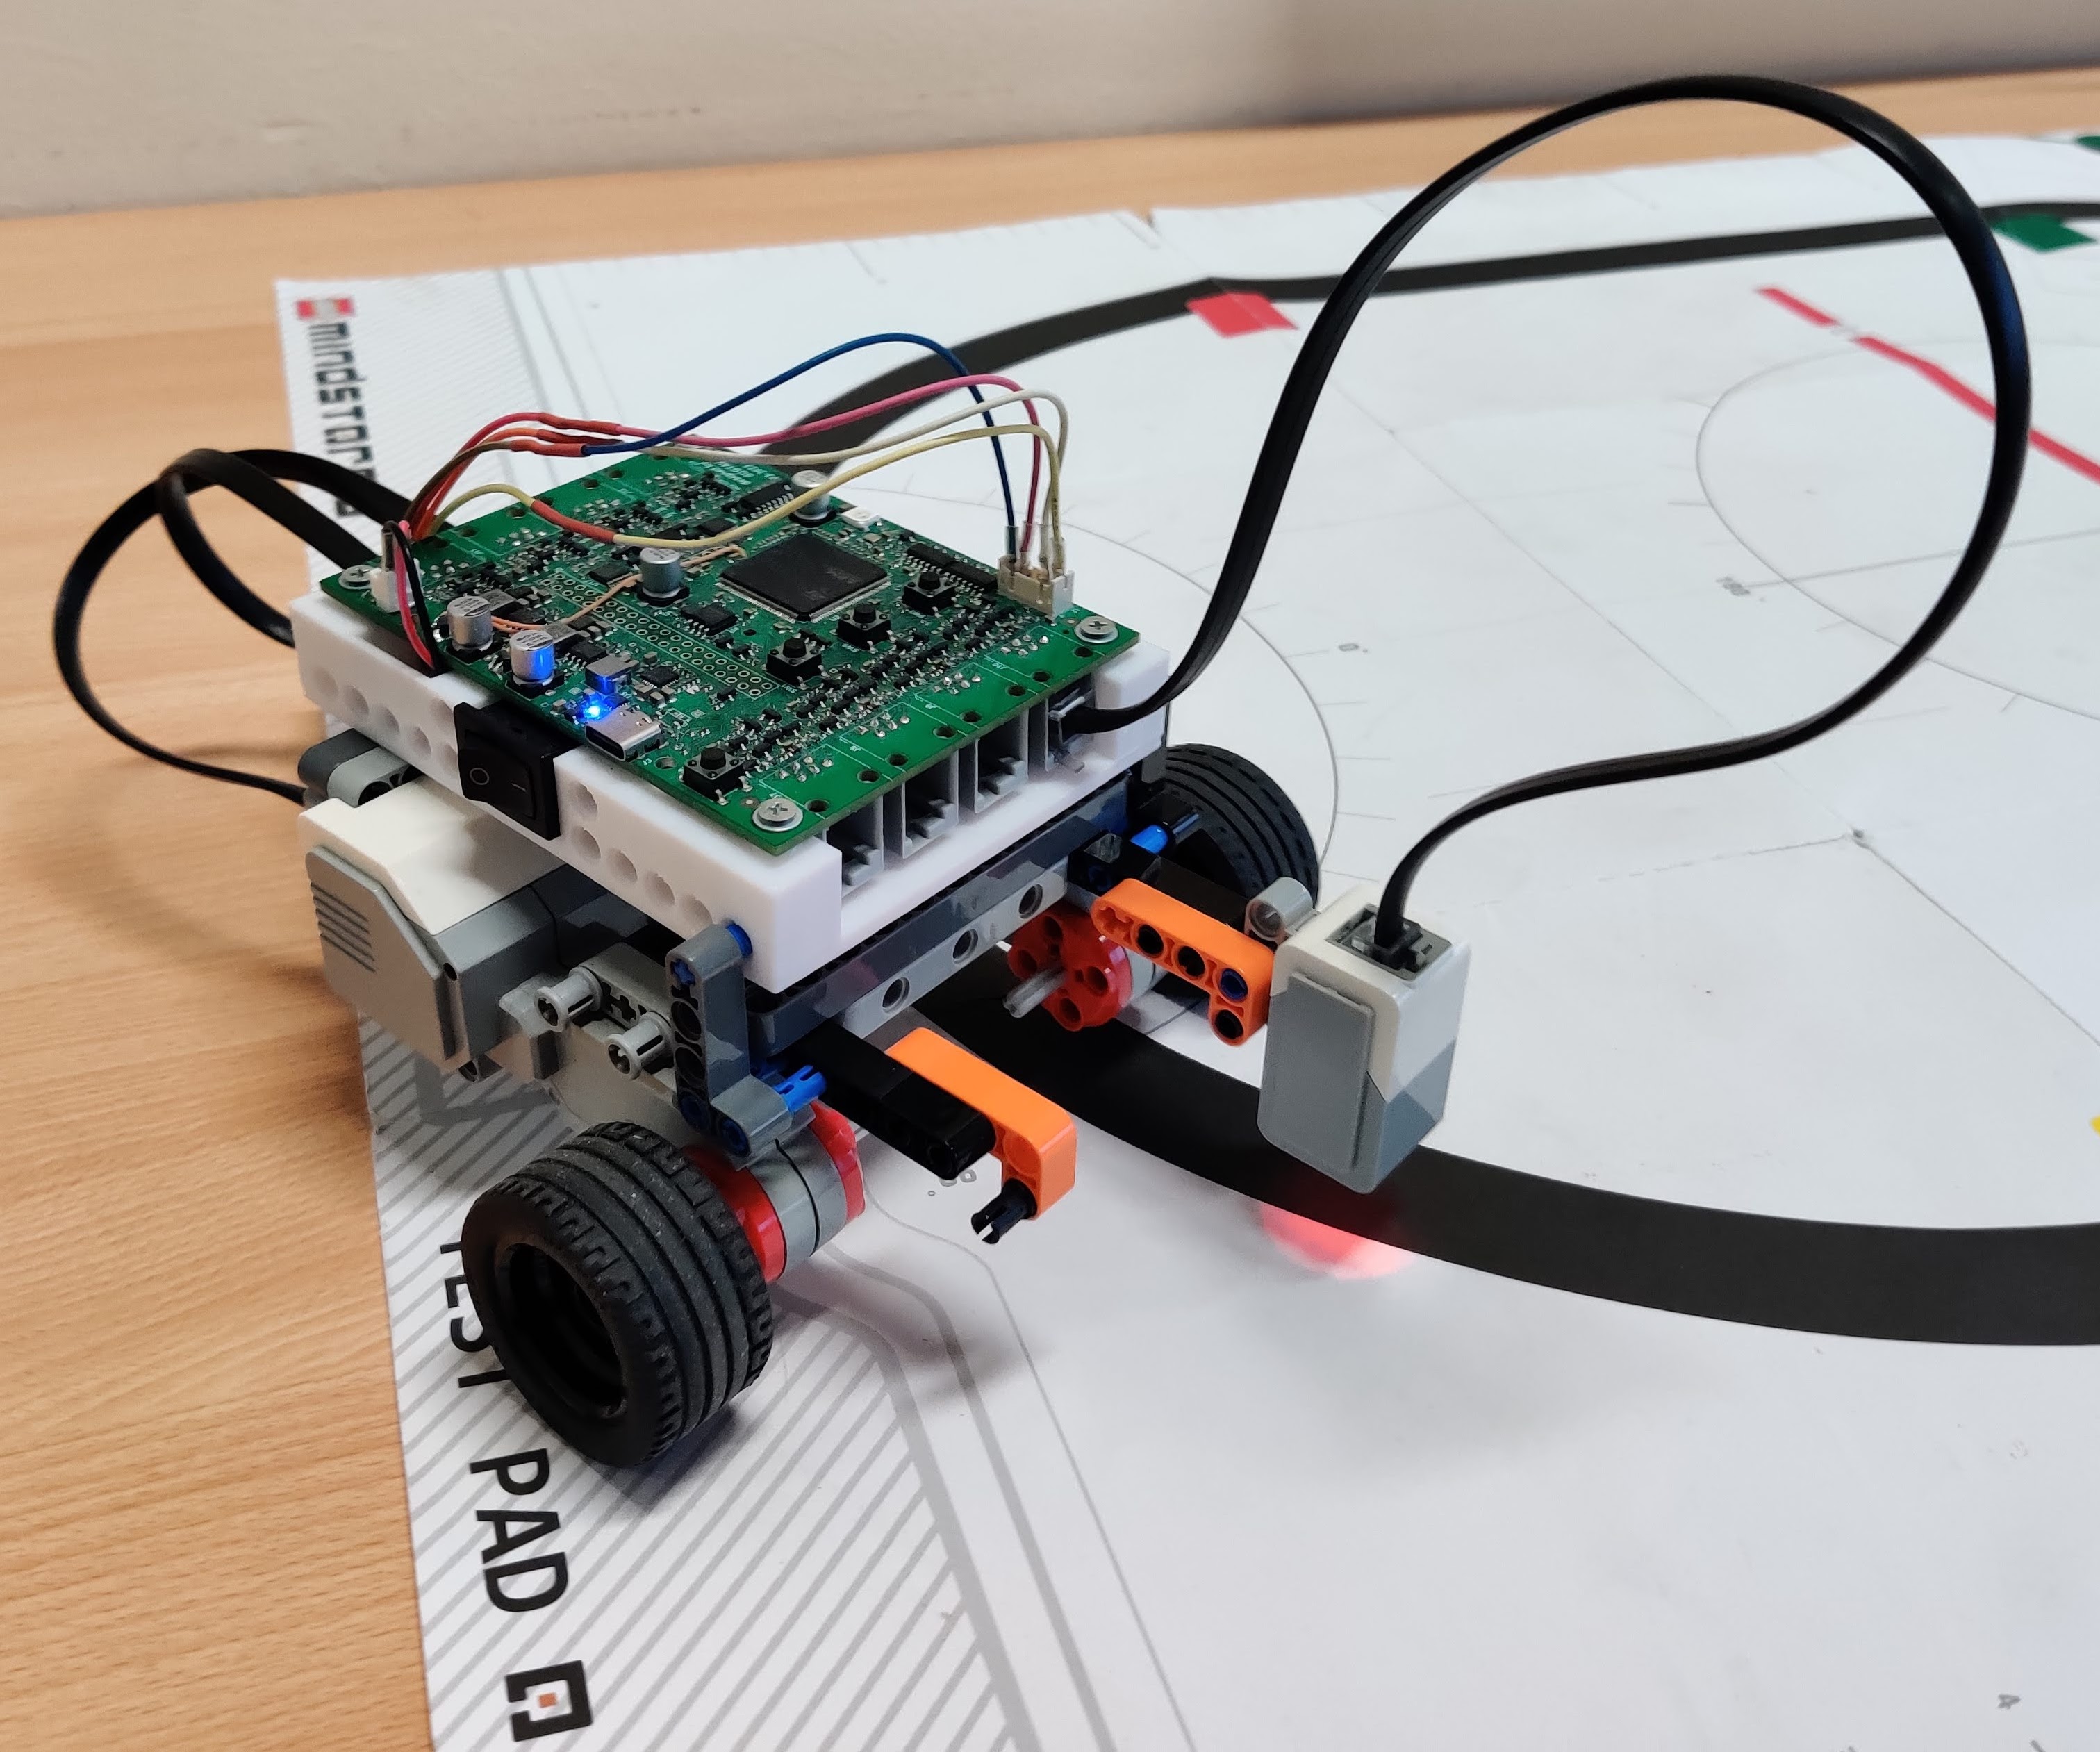
Since a lot of this code is similar to the blink example, we highlighted the main changes. In particular we now import three extra primitives and disable the sleep mode on the motor drivers. Using this setup a simple line follower can be written in just a few lines of code as shown in the main function.
@external("env", "chip_delay")
declare function delay(value: i32): void;
@external("env", "chip_pin_mode")
declare function pinMode(pin: i32, mode: i32): void;
@external("env", "chip_digital_write")
declare function digitalWrite(pin: i32, value: i32): void;
@external("env", "drive_motor")
declare function driveMotor(port: i32, speed: i32): void;
@external("env", "setup_uart_sensor")
declare function setupUARTSensor(port: i32, mode: i32): void;
@external("env", "read_uart_sensor")
declare function readUARTSensor(port: i32): i32;

enum PinVoltage {
    LOW  = 0,
    HIGH = 1,
}

enum PinMode {
  INPUT = 0,
  OUTPUT = 2
}

enum Pin {
  powerSupply = 60,
  motorABDriverSleep = 46,
  motorCDDriverSleep = 78,
}

enum InputPort {
  portA = 0,
  portB,
  portC,
  portD
}

enum OutputPort {
  port1 = 0,
  port2,
  port3,
  port4
}

enum ColorSensorMode {
  reflectivity = 0,
  ambient,
  colour
}

function setupBoard(): void {
    // Configure and enable power supply pin (active low).
    pinMode(Pin.powerSupply, PinMode.OUTPUT);
    delay(500); // Wait for 500ms to avoid current spike.
    digitalWrite(Pin.powerSupply, PinVoltage.LOW);

    // Disable sleep on motor AB driver.
    pinMode(Pin.motorABDriverSleep, PinMode.OUTPUT)
    digitalWrite(Pin.motorABDriverSleep, PinVoltage.HIGH)

    // Disable sleep on motor CD driver.
    pinMode(Pin.motorCDDriverSleep, PinMode.OUTPUT)
    digitalWrite(Pin.motorCDDriverSleep, PinVoltage.HIGH)
}

const threshold = 5;

export function main(): void {
    setupBoard();

    // Setup color sensor.
    setupUARTSensor(InputPort.portA, ColorSensorMode.reflectivity);

    while (true) {
        if (readUARTSensor(InputPort.portA) < threshold) {
            // Drive right.
            driveMotor(OutputPort.port1, 5000);
            driveMotor(OutputPort.port2, 0);
        }
        else {
            // Drive left.
            driveMotor(OutputPort.port1, 0);
            driveMotor(OutputPort.port2, 5000);
        }
        delay(5);
    }
}